How To Make A Sendinblue Account
Creating custom forms in Sendinblue for your WordPress website can be a daunting task, but fear not! With our easy-to-follow guide, you'll be up and running in no time. Before we dive into the how-to, let's take a quick look at why custom forms are important. Custom forms allow you to gather specific information from your website visitors, which can then be used to tailor your marketing efforts. This can lead to higher engagement rates and ultimately, more sales. So, without further ado, let's get started! Step-by-Step Guide: Step 1: Sign up for a Sendinblue account The first step to creating custom forms with Sendinblue is to sign up for an account on their website. The process is straightforward and can be completed in just a few minutes. Once you have signed up, you will be taken to your dashboard where you can access all of Sendinblue's features. Step 2: Create a new list Before you can create a custom form, you will need to create a new list. A list is where your subscribers will be stored. To create a new list, simply click on the "Lists" tab in your Sendinblue dashboard and then click on the "Create a List" button. Give your list a name and then click on "Create." Step 3: Create a custom form Once you have created a list, it's time to create your custom form. To do this, click on the "Forms" tab in your dashboard and then click on the "Create a Form" button. You will be taken to a page where you can choose the type of form you want to create. There are four options: embedded form, pop-up form, landing page, and form builder. Choose the type of form that best suits your needs. Step 4: Design your form After you have chosen the type of form you want to create, it's time to design it. Sendinblue's form builder is intuitive and easy to use. You can choose from a variety of templates or start from scratch. Once you have designed your form, click on the "Save and Next" button. Step 5: Configure your form settings The next step is to configure your form settings. You can choose what fields you want to include in your form and what information you want to collect from your subscribers. You can also set up confirmation and error messages, as well as redirect URLs. Once you have configured your settings, click on the "Save and Next" button. Step 6: Install your form The final step is to install your form on your WordPress website. Sendinblue provides several options for installation, including a WordPress plugin and code snippets that you can insert into your website's HTML. Choose the installation method that best suits your needs and follow the instructions provided. Tips for Creating Custom Forms: 1. Keep it simple - only ask for information that you truly need 2. Make sure your form is visually appealing and easy to use 3. Offer an incentive for signing up, such as a discount or free download 4. Test your form on multiple devices to ensure it works properly 5. Continuously monitor and analyze your form's performance to make improvements In conclusion, creating custom forms with Sendinblue is essential for any business looking to improve their marketing efforts. By following our step-by-step guide and implementing our tips, you'll be on your way to creating effective and engaging custom forms in no time! 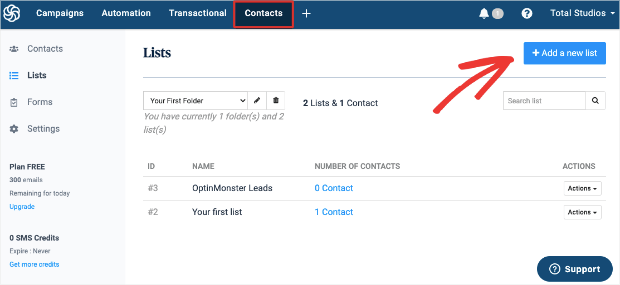
optinmonster.com
Post a Comment for "How To Make A Sendinblue Account"